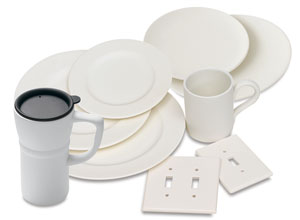
A Firm Foundation For Your Creation
That's right, we're talking about the first and foremost step in creating your beautiful painted pottery masterpiece. You've got to start off right in order to finish with a bang, so let's talk base coat.

Before you even dip your brush into your selected color, you've got to prep your piece. So grab that sponge, dip it in your water bowl, wring it out and wipe down your piece. Rinse and repeat as often as you feel necessary to get rid of any and all dust and minute imperfections. A slightly damp piece will also take that first coat of glaze with less pulling.
OK...load up your brush, but take it a little easy. Less is more, so to speak. Three even, not too heavy coats will get you the best base, with luster and nice shine when the piece is fired. Applying too much glaze at once could cause the glaze to dry with a ridged effect.
Try to apply your glaze in the same direction on each coat, to minimize brush strokes and to create the most smooth starting point for your intended decoration. Be patient...let the piece dry a bit between coats so you can ensure you get even coverage.
Make sure you get glaze into the nooks and crannies of figurines and more detailed pieces. Don't forget to get the glaze all around handles and lipped edges.
Once three even coats have been applied and allowed to dry a bit, you're ready to get busy and create that unique and gorgeous potter piece. Might we suggest you decorate your beautiful base with some polka dots, since they happen to be part of the July theme?


0 Comments:
Post a Comment
<< Home